Netbird is an open-source peer-to-peer overlay network that I use in my Homelab. It is available as a hosted service, but it can also be self-hosted. There is an official guide for self-hosting, but it does not cover how to run Netbird on Kubernetes. It also relies on bespoke scripts which are neither declarative nor idempotent.
In this blog post, I'll show how you can set up Netbird on Kubernetes in a declarative way. We will use Keycloak as an identity provider and Crossplane to declaratively configure Keycloak. The article will cover how Netbird works, the steps to prepare Keycloak and Crossplane, and the installation of Coturn and Netbird. By the end, you'll have a secure and efficient networking solution for your Homelab.
Prerequisites
- A Kubernetes cluster
- A recent version of
kubectlthat supports Kustomize - A way to manage secrets in the cluster (I'm using Sealed Secrets for this in my Homelab, but I will use plain Kubernetes secrets in this article for the sake of compatibility with other solutions)
- Support for persistent volumes in the cluster (I'm using Proxmox CSI for this)
- An ingress controller that is set up to automatically issue TLS certificates
- Support for services with
type: LoadBalancer - Keycloak and Crossplane installed in the cluster (see my previous article on how to do this)
How Netbird works
Netbird builds on top of WireGuard, a modern VPN technology that is built in to the Linux kernel. Netbird adds automatic IP management, public/private key generation and NAT traversal, making it easier to use than plain WireGuard.
Netbird consists of five different components; a client applicaiton, a web dashboard, management and signal services and a relay service. We have to install the last four of these in our Kubernetes cluster in order to self-host Netbird.
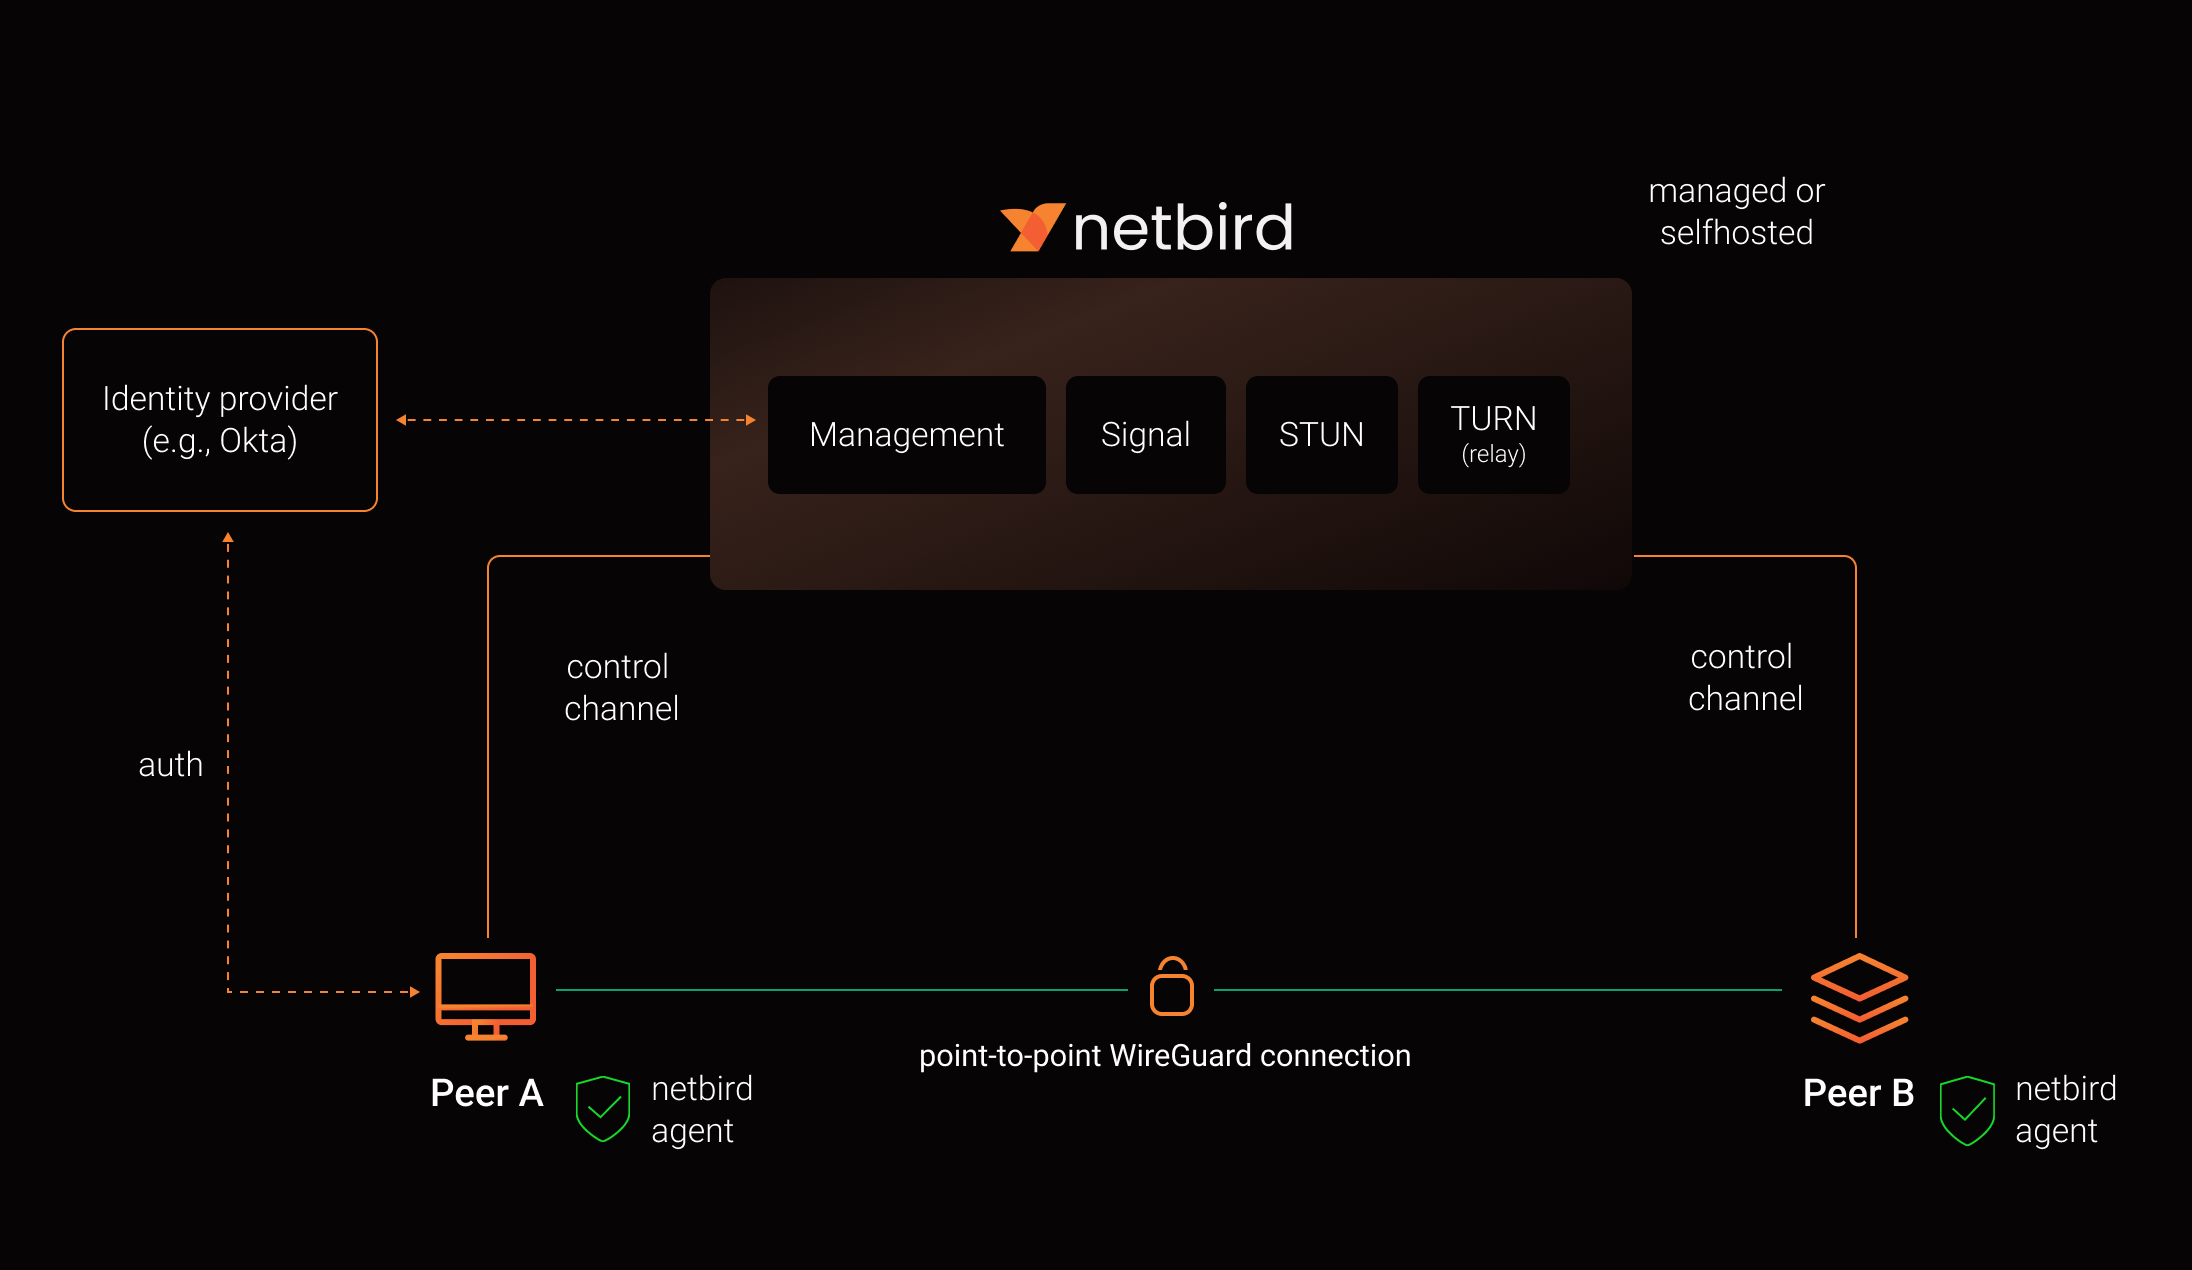
The management service is the central coordination component for NetBird. It maintains network state, distributes WireGuard public keys, authenticates peers, and distributes network updates. The signal service facilitates the negotiation of direct connections between peers, acting as a notification mechanism for peers to find each other and exchange connection information. The relay service is a TURN server (based on Coturn, an open-source TURN implementation) that acts as a fallback to relay traffic between peers when a direct connection is not possible.
For more details, see this article from the official Netbird documentation.
Preparing Keycloak and Crossplane
Before we can start installing the Netbird components, we need to prepare Keycloak, which we will be the identity provider for our Netbird installation. If you haven't already, please follow the steps in my previous article to install Keycloak and set up Crossplane so it can manage your Keycloak instance.
The Netbird backend needs access to a built-in role in Keycloak. We have to import this role into Crossplane to be able to refer to it later when creating an OIDC client for the Netbird backend. The developer of the Keycloak Crossplane provider has made a function for this that we can use: function-keycloak-builtin-objects.
To install this function, go to the folder that has your Crossplane manifests and create a new subfolder called functions. Create a file inside this folder called builtin-objects.yaml and add the following:
We also need to create a Composite Resource Definition that the function will consume. Create a file called xrds.yaml and add the following:
The next step is to add the new manifests to the kustomization.yaml file:
And finally install the updated manifests by running the following command:
$ kubectl kustomize . --enable-helm | kubectl apply -f -
The function should now be installed and you should see three new pods in the Crossplane namespace:
$ kubectl -n crossplane get pods
NAME                                                             READY   STATUS    RESTARTS      AGE
crossplane-6b5b8f9549-8rnt9                                      1/1     Running   0             6d22h
crossplane-rbac-manager-bcddfb7-hghhr                            1/1     Running   0             6d22h
function-auto-ready-ad9454a37aa7-6c66f4984d-zbxnl                1/1     Running   0             87s
function-extra-resources-fa66e8ab9f79-78895cd9df-klgt8           1/1     Running   0             87s
function-keycloak-builtin-objects-07d5cc1b7eda-9bfd8c7b9-jt9bz   1/1     Running   0             87s
provider-keycloak-29a672ab11e0-5976b5f7b4-z8czx                  1/1     Running   0             6d22h
We will now use the function to import the built-in clients and roles in our Keycloak installation. We will do this by creating an instance of the Composite Resource Definition we created earlier. Switch to the folder containing your Keycloak manifests and create a new file called builtin-objects.yaml. Add the following content:
Then update the kustomization.yaml with the new manifest:
Apply the new manifests by running:
$ kubectl kustomize . --enable-helm | kubectl apply -f -
After a few minutes, you should see that Crossplane has picked up the built-in clients:
$ kubectl get client
NAME                                     SYNCED   READY   EXTERNAL-NAME                          AGE
builtin-homelab-account                  True     True    4d8e49f7-bcfd-4c43-b70c-779d5818161f   47s
builtin-homelab-account-console          True     True    75cafd6c-d811-42b6-b8b5-9cec1cd5ea51   47s
builtin-homelab-admin-cli                True     True    eeb8cd88-1c9a-4028-b517-8328298a0545   47s
builtin-homelab-broker                   True     True    35f9c59c-42a3-4b64-80b1-1be3e43dd1d1   47s
builtin-homelab-realm-management         True     True    5e343761-2bc3-4994-9980-b34050ed960b   47s
builtin-homelab-security-admin-console   True     True    f6285c1d-d591-483b-a889-fd822cf5a371   47s
...
You can check the status by running kubectl get xbuiltinobjects. Once the built-in clients have been imported you are are ready to start installing Netbird!
Installing Coturn
The first component we will install is Coturn. It will act as the relay service for our Netbird installation, acting as a fallback to relay traffic between peers when a direct connection is not possible.
We start by creating a namespace. Create a new folder called coturn and add a file inside it called namespace.yaml with the following content:
To prevent unauthorized users from using our Coturn instance, we will protect it with a username and password. Create a file called secrets.yaml with the following content. Replace the placeholder with a randomly generated password of sufficient strength.
We can then install Coturn using a Helm chart provided by jaconi. Create a file called kustomization.yaml and add the following:
Replace the realm and certificate.dnsName values with your domain. You might also need to change the certificate.issuerName value if you're not using Let's Encrypt.
As usual, we apply the new manifests with the following command:
$ kubectl kustomize . --enable-helm | kubectl apply -f -
Preparing Netbird Installation
We are now ready to start installing the core Netbird components: the management and signal services and the dashboard. For simplicity, I will collectively refer to the management and signal services as the the Netbird backend in the rest of the post.
Since these components are related, we will install them in the same namespace. The folder structure will therefore be a bit different compared to the previous components we installed. Create a folder called netbird. Inside it, create a folder structure that looks like this, with three kustomization.yaml files and one file called namespace.yaml
netbird
├── backend
│   └── kustomization.yaml
├── dashboard
│   └── kustomization.yaml
├── kustomization.yaml
└── namespace.yaml
In the namespace.yaml file add the following:
And add this to the outermost kustomization.yaml file:
You can leave the remaining two kustomization.yaml files empty for now.
Installing Netbird Backend
We can now install the Netbird backend. Switch to the netbird/backend folder. First, we need to create two secrets, one for the backend's OIDC client and one for accessing Coturn. Create a file called secrets.yaml with the following content. Remember to update the placeholders. Use a randomly generated string for the OIDC client and the same password that you used earlier for the Coturn credentials.
We will then use Crossplane to create an OIDC client in Keycloak. Create a file called oidc-client.yaml and add the following.
In addition to the client itself, we create a ClientServiceAccountRole that assigns the built-in role view-users to the OIDC client. This gives Netbird permission to list the users in your Keycloak instance and is needed for Netbird's user management features. (Netbird also supports automatically deleting users from Keycloak when they are deleted in Netbird. If you want to use this feature, you have to assign another built-in role manage-users to the OIDC client.)
We will use another Helm chart provided by jaconi to install the Netbird backend and signal. Add the following to the empty kustomization.yaml file you created earlier:
Note that this file contains several URLs that need to be updated to match your cluster.
Installing Netbird Dashboard
The final step is to install the Netbird dashboard. The dashboard also needs an OIDC client, so we will create that first. Switch to the netbird/dashboard folder and create a file called oidc-client.yaml. Add the following content. Replace the redirect and post-logout URLs with appropriate ones for your cluster.
Note that we use a ClientDefaultScopes resource to set the default scopes for the client. The Netbird dashboard needs a few extra scopes, most notably a custom scope called netbird-api. We will create this scope in the next step.
Create a new file called oidc-scopes.yaml and add the following:
Here, we use a ClientScope resource to create the scope and a ProtocolMapper to set the audience for the scope.
We are now ready to install the Netbird dashboard. Add the following to the kustomization.yaml file. Update the placeholders with the correct URLs for your cluster.
Everything should now be ready to install Netbird! Switch to the parent folder (netbird) and run the following command to install all the Netbird components:
$ kubectl kustomize . --enable-helm | kubectl apply -f -
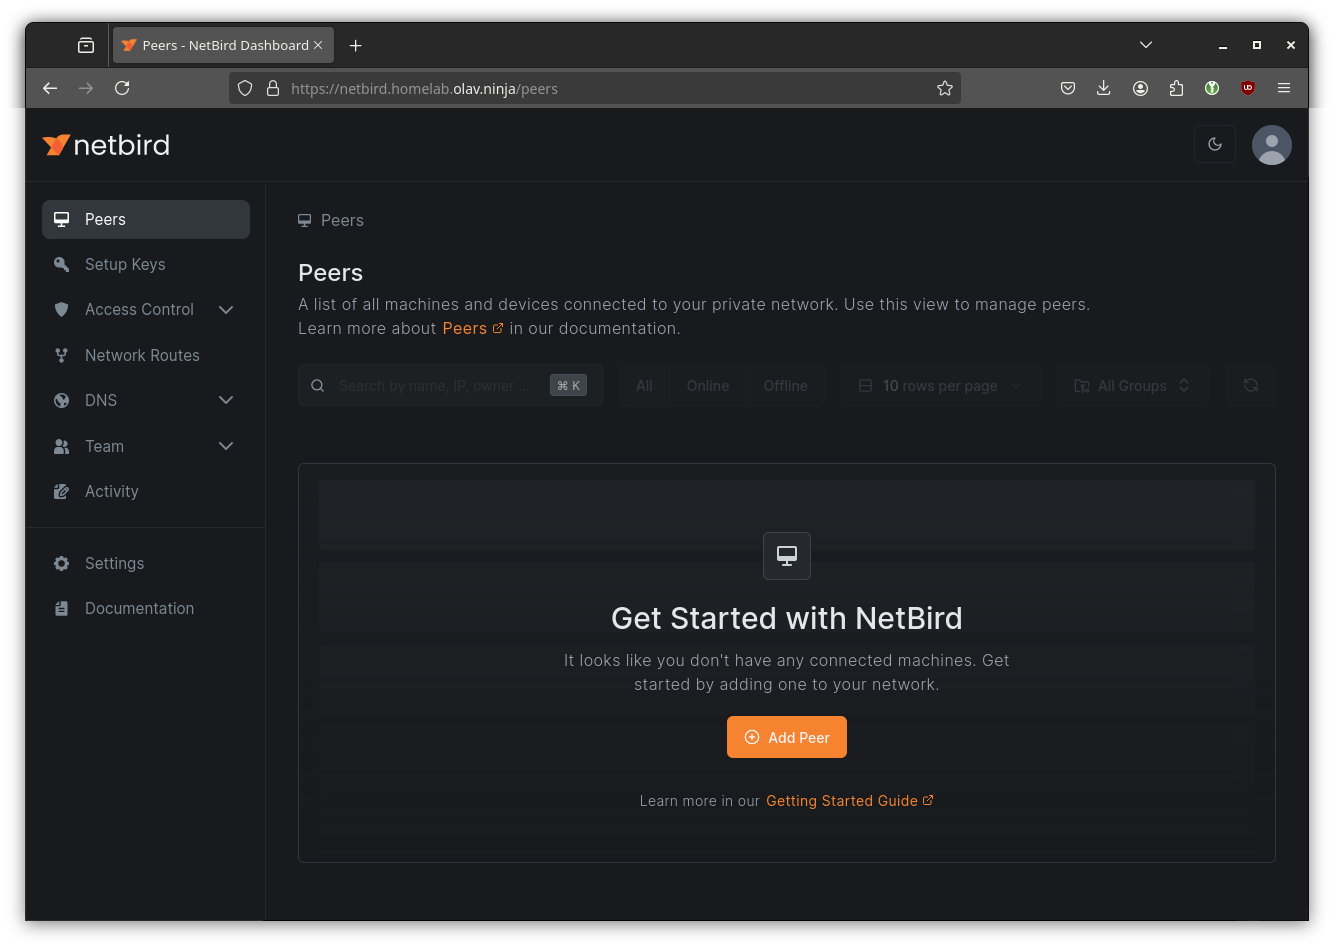
After a few minutes you should be able to log in to the Netbird dashboard using your Keycloak account:
Conclusion
After following the steps in this article, you should have a full self-hosted setup of Netbird running in your cluster. You can now start connecting machines to your own private Netbird network!