As my Homelab grows, having separate user accounts for each application is getting cumbersome. To make things easier, I decided to set up Single Sign-On (SSO) so I can use one account for all applications. OpenID Connect (OIDC) is the de-facto standard for SSO and it is supported by most applications and identity providers. I chose to use Keycloak, an open-source identity and access management tool that supports OIDC, to host my own OIDC identity provider.
Since I prefer declarative configuration and my Homelab runs on Kubernetes, I decided to use Crossplane. Crossplane is an open-source tool that extends Kubernetes to manage external resources declaratively. This combination promised to simplify the setup of Keycloak and align with modern GitOps practices for better scalability and maintenance.
In this blog post, I'll show you how to set up SSO using Keycloak and Crossplane in a Kubernetes cluster. We'll go through the steps to set up Keycloak, configure it for OpenID Connect, and integrate it with Crossplane.
Prerequisites
- A Kubernetes cluster
- A recent version of
kubectlthat supports Kustomize - A way to manage secrets in the cluster (I'm using Sealed Secrets for this in my Homelab, but I will use plain Kubernetes secrets in this article for the sake of compatibility with other solutions)
- Support for persistent volumes in the cluster (I'm using Proxmox CSI for this)
- An ingress controller that is set up to automatically issue TLS certificates
Installing Keycloak
We will be using a Helm chart provided by Bitnami to install Keycloak in the cluster.
Create a new directory called keycloak and switch to it. First we will create a namespace for Keycloak. Create a file called namespace.yaml containing the following:
The next step is to create secrets for the Keycloak admin user and the PostgreSQL database that Keycloak uses. Create a file called secrets.yaml and add the following:
We can now use Kustomize to install the Helm chart and tie in the resources we created earlier. To do this, create a file called kustomization.yaml with the following content. Replace ingress.hostname with the hostname you want Keycloak to use.
Some values to note here are the proxy and ingress values. By default, Keycloak only accepts HTTPS connections and has to be configured with pre-generated certificates. We disable this behaviour by setting proxy to edge so that we can let the ingress controller handle HTTPS and certificates for us. This also lets other apps in the cluster access the Keycloak service over HTTP. This will be useful later when we set up the Keycloak Crossplane provider.
Note that we also set postgresql.primary.persistence.existingClaim to keycloak-postgresql. I have not included a PV/PVC for this volume since the steps needed to create these will differ depending on the storage solution you are using. You will therefore need to create this volume and the corresponding PV/PVCs in your cluster before proceeding.
We are now ready to install Keycloak! Run the following command in the keycloak directory to apply the manifests:
$ kubectl kustomize . --enable-helm | kubectl apply -f -
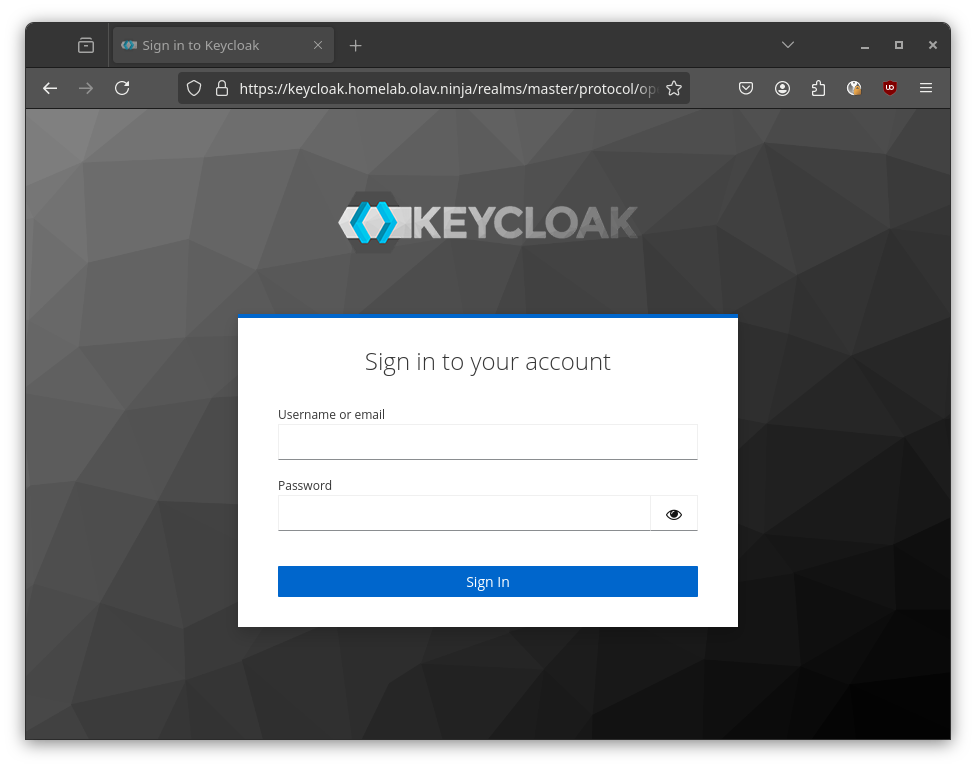
If everything goes well, you should now be able to access the Keycloak Admin UI in your browser:
Installing Crossplane
Create a new directory called crossplane and switch to it. As with Keycloak, we start by creating a namespace. To do this create a file called namespace.yaml and add:
We can the install Crossplane using the official Helm chart. Create a file called kustomization.yaml and add the following:
Finally, run the following command in the crossplane directory to apply the manifests and install Crossplane:
$ kubectl kustomize . --enable-helm | kubectl apply -f -
You can confirm that the installation was successfull by checking if the Crossplane pods are up and running:
$ kubectl -n crossplane get pods
NAME                                    READY   STATUS    RESTARTS   AGE
crossplane-6b5b8f9549-bg8xz             1/1     Running   0          44s
crossplane-rbac-manager-bcddfb7-fhd6l   1/1     Running   0          44s
Installing the Keycloak Provider for Crossplane
Crossplane does not have native support for managing Keycloak, but there is a great community maintained provider that we can use.
In the crossplane directory, create a file called providers.yaml and add the following:
Next, we need to give the provider admin credentials for Keycloak. To do this we will create a secret in the crossplane namespace and direct the provider to use it. First, create a file called secrets.yaml containing the following. Replace the placeholder with the password that you used for the Keycloak admin user:
We then create a ProviderConfig for the provider, referring to the secret we just created. Create a file called provider-config.yaml and add the following:
To tie it all together, make the following changes to the kustomization.yaml file we created earlier:
You can then install the provider by applying the manifests again. Note that we have to apply the manifests twice because the ProviderConfig CRD is not available until the provider has been installed.
$ kubectl kustomize . --enable-helm  | kubectl apply -f -
$ kubectl kustomize . --enable-helm  | kubectl apply -f -
You should now see a third pod running in the crossplane namespace:
$ kubectl -n crossplane get pods
NAME                                              READY   STATUS    RESTARTS   AGE
crossplane-6b5b8f9549-bg8xz                       1/1     Running   0          14m
crossplane-rbac-manager-bcddfb7-fhd6l             1/1     Running   0          14m
provider-keycloak-29a672ab11e0-5976b5f7b4-4rcn5   1/1     Running   0          116s
Configuring Keycloak
We can now start configuring Keycloak declaratively using Crossplane. The first thing we need to do is to create a realm. Switch back to the keycloak directory and create a file called realms.yaml with the following content:
We can then start adding user(s) to the realm. Create a file called users.yaml and add the following:
In this case I have only added one (example) user. You can add more users in the same file if you need.
Next, we add the new manifests to the kustomization.yaml file:
And run the following command to apply them:
$ kubectl kustomize . --enable-helm | kubectl apply -f -
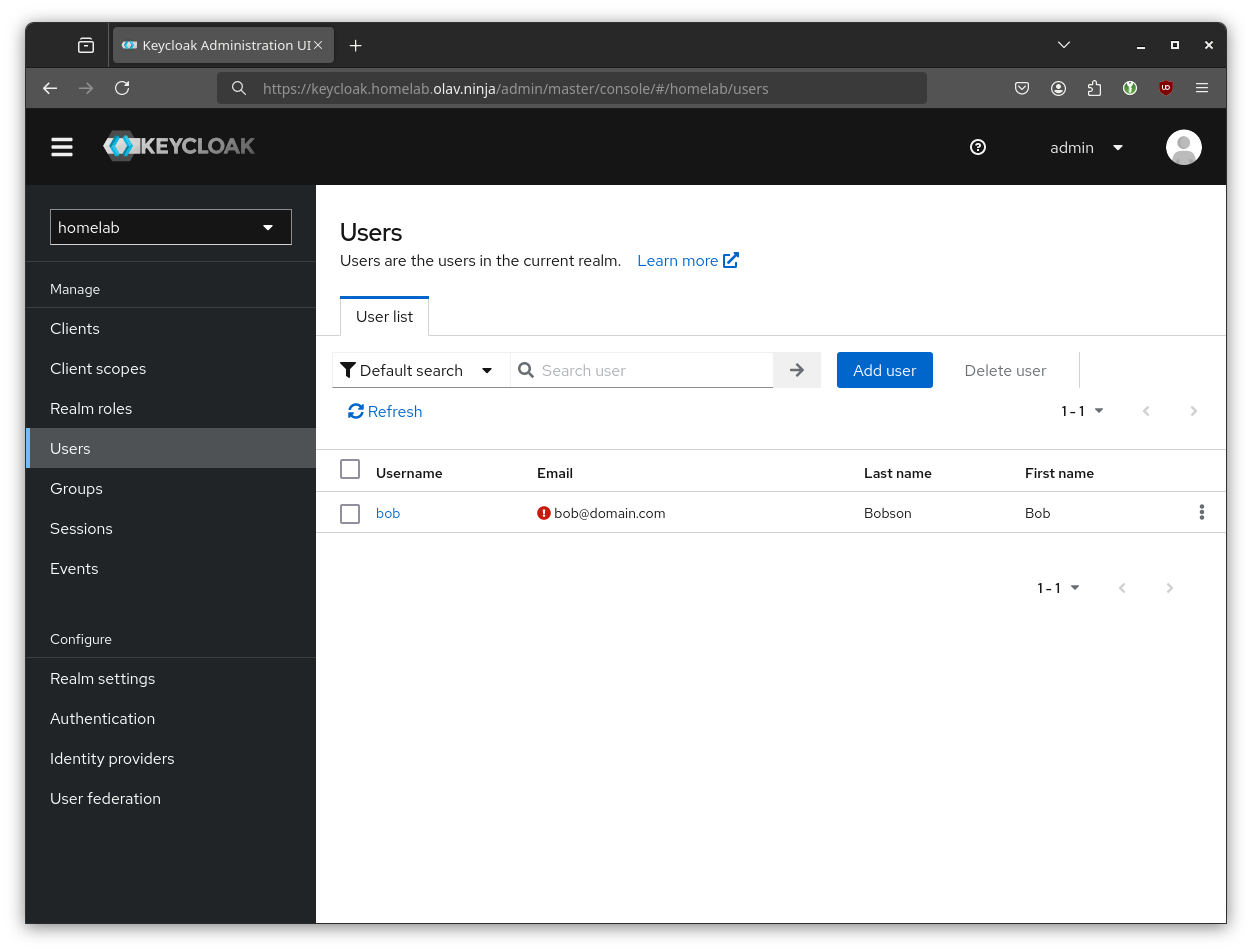
You should now see the realm and user(s) appear in the Keycloak Admin UI:
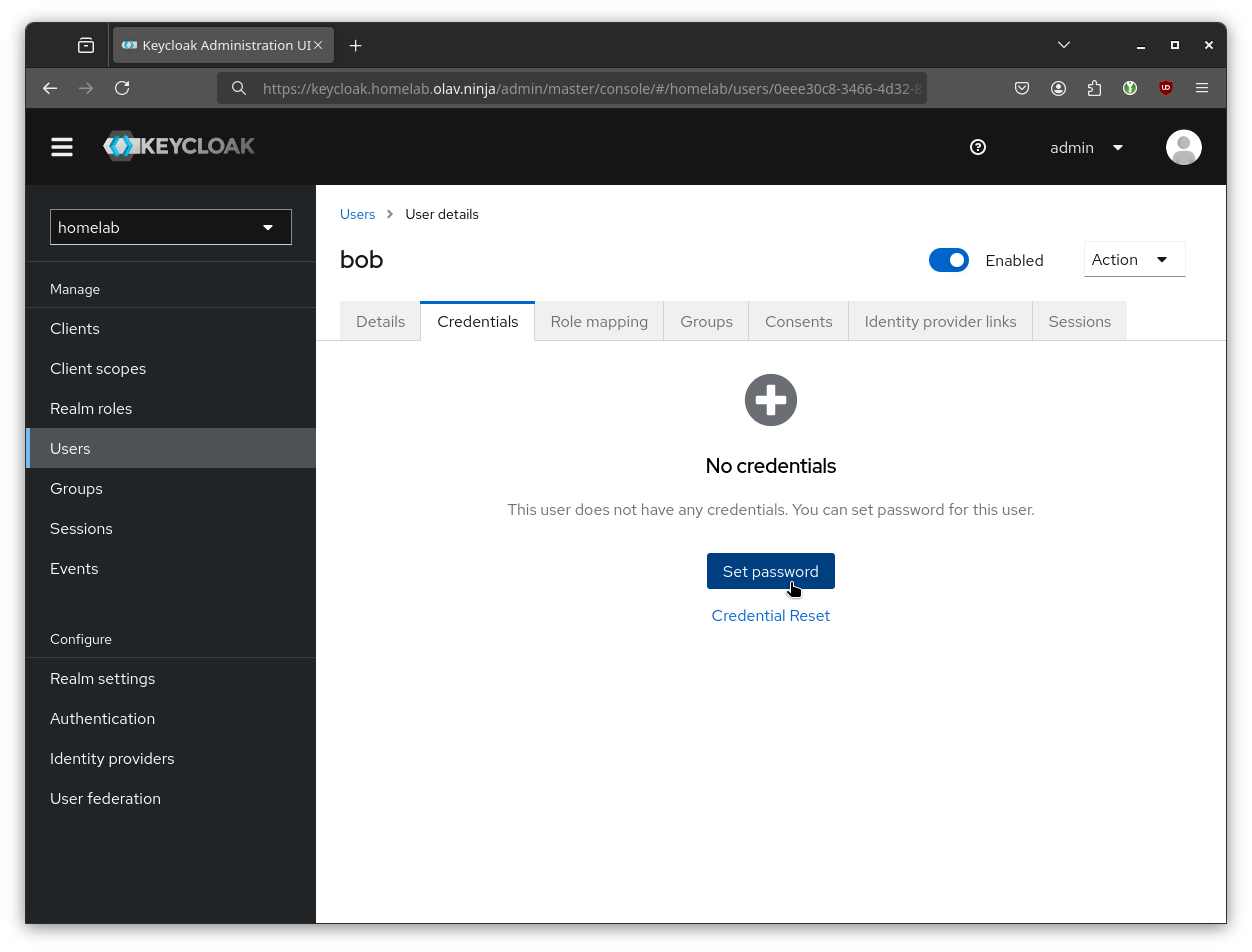
You will need to set a password for the newly created user(s) to be able to login. This can be done declaratively (using the initialPassword parameter) but I have been doing it manually since I don't want users' passwords stored as secrets in the cluster. The password can be set from the Credentials tab on the user details page:
Setting up OIDC login
We are now ready to start using our new Keycloak installation! In this section, I will show how to set up OIDC login in one of the applications that I run in my cluster, Gitea.
We will be using the official helm chart to install Gitea. The chart supports configuring OIDC with Helm values. It expects the credentials for the OIDC client to be provided as a secret with a certain format. The secret should have a field called key containing the Client ID and a field called secret containing the Client Secret.
Before we can create this secret, we need to create a namespace for Gitea. Create a folder called gitea and inside it create a file called namespace.yaml with the following content.
We can then create the secret. Create a file called secrets.yaml with the following content. Replace the placeholder with a randomly generated string.
The next step is to use Crossplane to create an OIDC client in Keycloak with the same Client ID and secret. Create a file called oidc-client.yaml and add the following. Remember to replace the URLs with the correct ones for your cluster.
Finally, we will install Gitea using the Helm chart and the manifests we just created. Make a file called kustomization.yaml with the following content. Again, remember to replace the URLs with the correct ones for your cluster.
To make the installation more lightweight, I have disable the HA components. You can tweak this according to your needs. I have also disabled user registration, since Keycloak will handle the user management for us.
We are now ready to install Gitea. Run the following command in the gitea directory:
$ kubectl kustomize . --enable-helm | kubectl apply -f -
After a few seconds you should see that the Crossplane provider has created an OIDC client:
$ kubectl get clients
NAME    SYNCED   READY   EXTERNAL-NAME                          AGE
gitea   True     True    f39fdd60-af0b-41ab-9802-dc5eab74dd84   58s
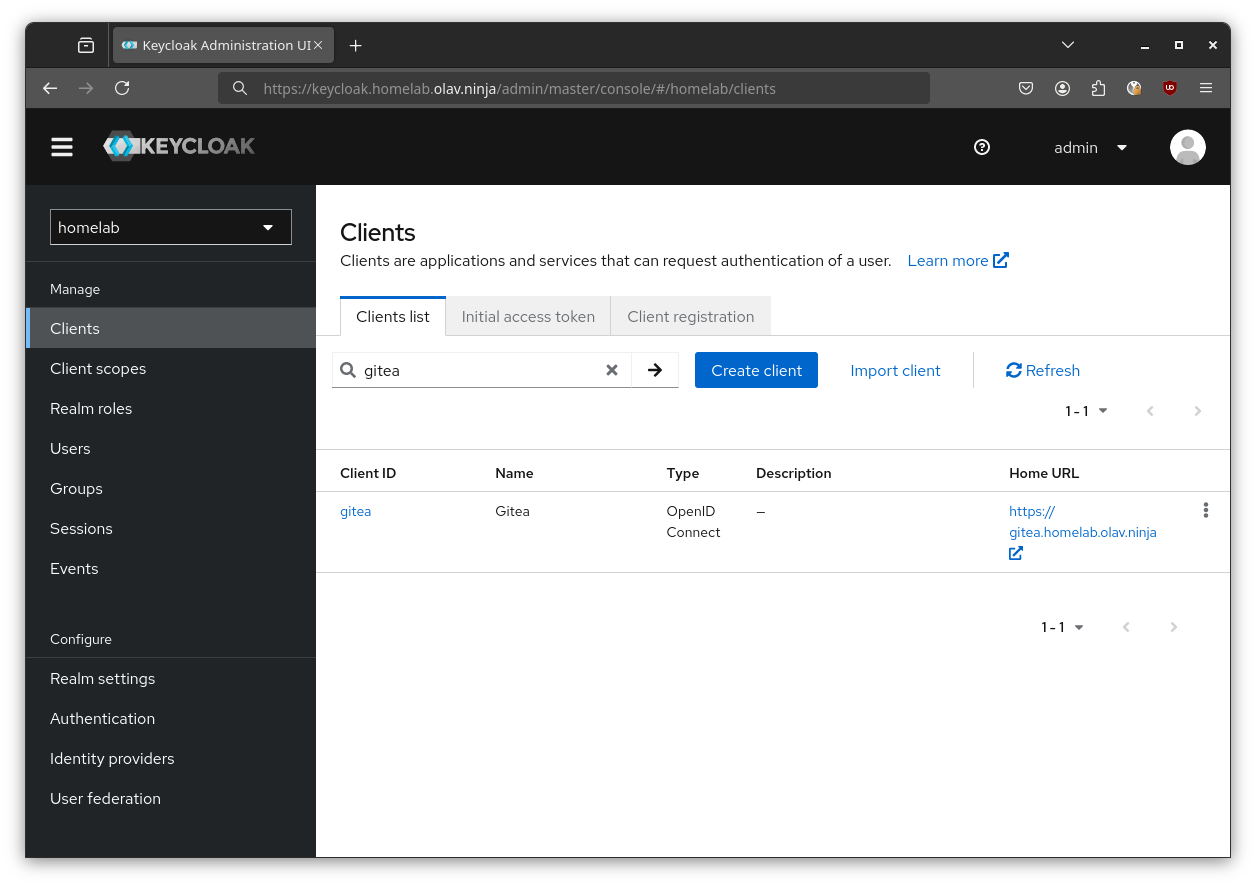
You should also be able to find the OIDC client in the Keycloak Admin UI under the Clients section:
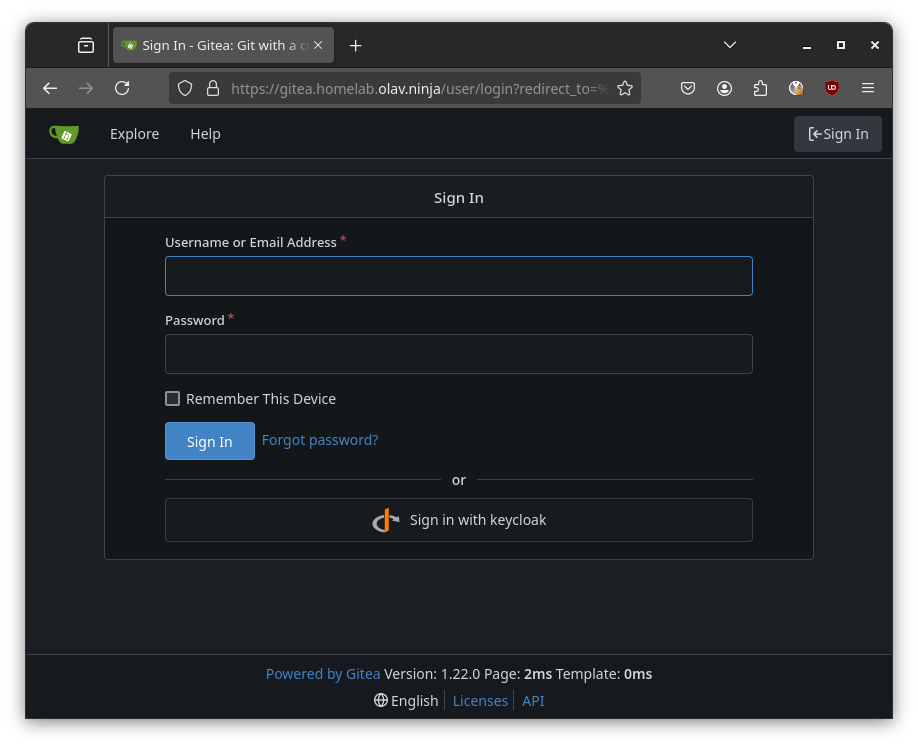
Once Gitea finishes initializing you should see Keycloak as one of the sigin-in options:
Conclusion
After following the steps in this article, you should have a working installation of Keycloak with SSO set up for a single application, Gitea. To add more applications, create a Client manifests with a corresponding secret and set the appropriate Helm values. The exact values you need to set will vary from application to application. In a future article, I will show how to do this for Netbird, an open-source peer-to-peer overlay network that I use in my Homelab.